At Siperb we use Amazon Web Service – Cognito to perform the Sign Up and Sign In. AWS Cognito is an oAuth based Authentication & Access Control service.

Web Application
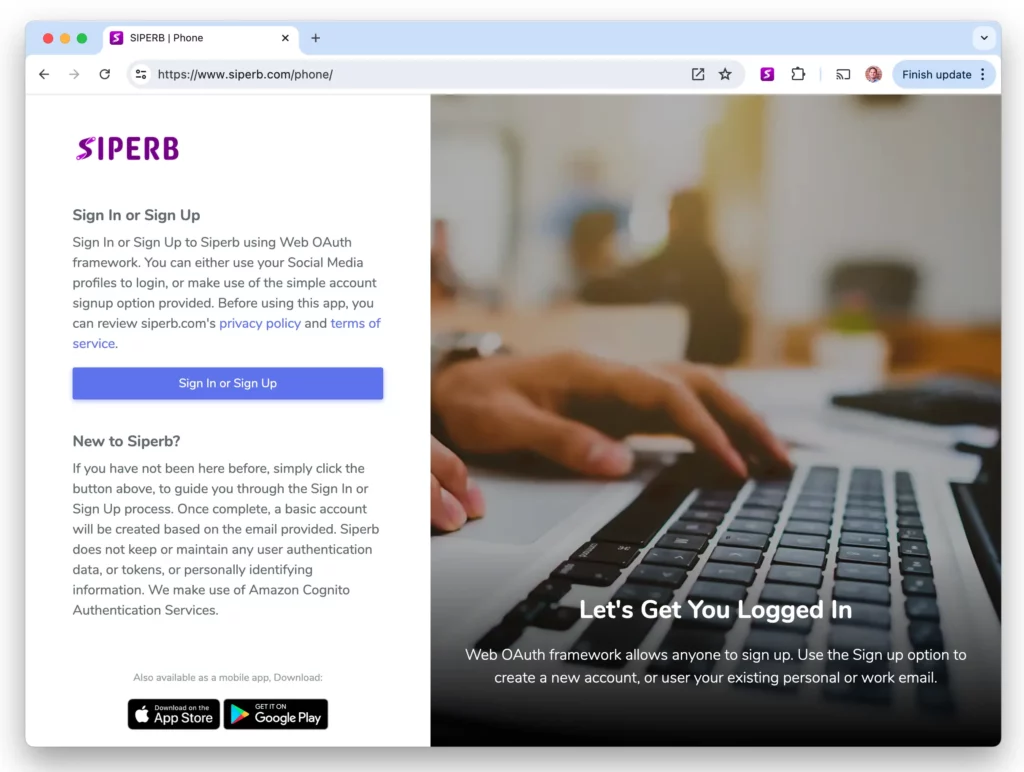
For the Web Application, you simply need to navigate to the url: https://www.siperb.com/phone/ in order to access the login window. The page will detect your session cookie and either show the phone, or redirect you to the login, either way, it’s a good page to bookmark.
Always make sure you are at the correct URL. https://www.siperb.com/phone/. Modern browsers now see sites that are accessed without a valid SSL Certificate as unsafe, so will warn you accordingly.
You can also install Siperb as a Progressive Web App (PWA). Click here for more information on how to install Siperb as a PWA.
Mobile Application
For the mobile applications, the process is far simpler. Simply search for “siperb” on the app store suited to your phone, and tap download. The URL for login and the flow from there is taken care of for you.
Both the mobile and the web authentication flow is the same, and if you login on the web, you will be able to login the same way in the mobile application.
You can find out more information about our Privacy Policy and Terms of Service before you start using our services.
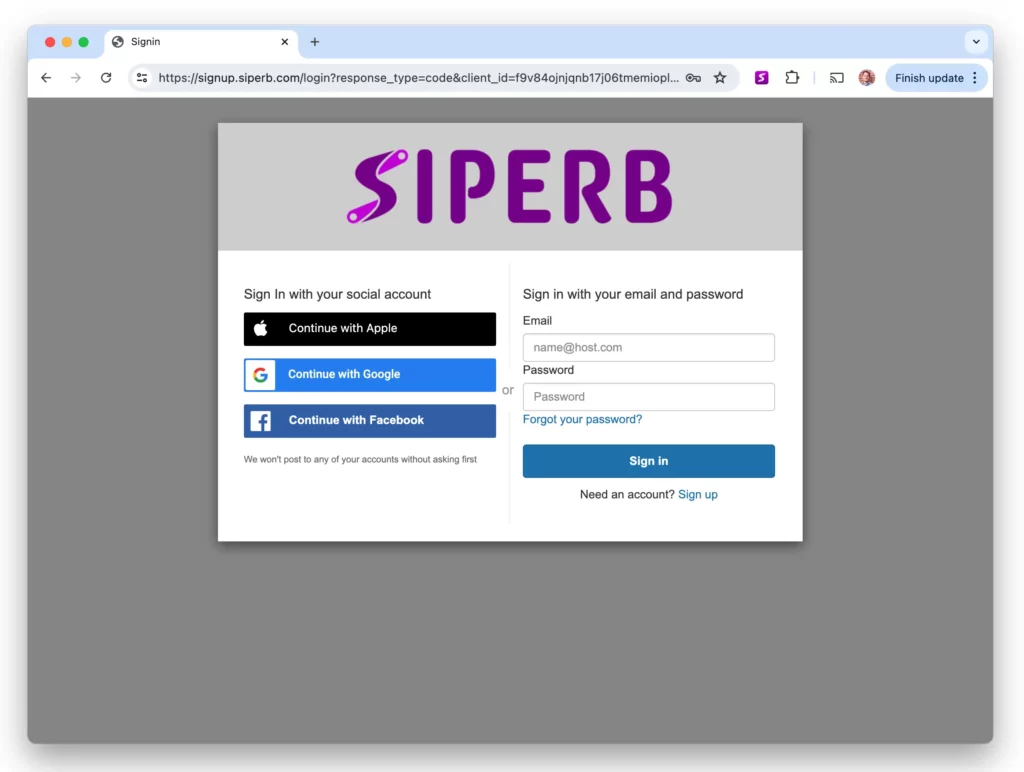
The Sign In or Sign Up button takes you to the same screen below.

The login process is designed to be simple and easy. We don’t ask for any personal information up front, and you can easily test out our system if you like without any commitment. Your account will be a free account by default.
Your account is based on your email – no matter how you decide to login.
We offer two ways to sign up. You can either click the “Sign up” link on the right, next to “Need an account?”, or you can use one of the providers on the left. The providers, offer you a way to use and existing service provider that you know and trust, for the authentication part of this process.
Your provider, like Apple, Google etc, will exchange a token with us on our Cognito backend, and we will accept this token allowing you access to our platform.
Either way, via directly using the sign up option, or by using your existing provider, the result will be the same, we will have an account based of the email of that service.
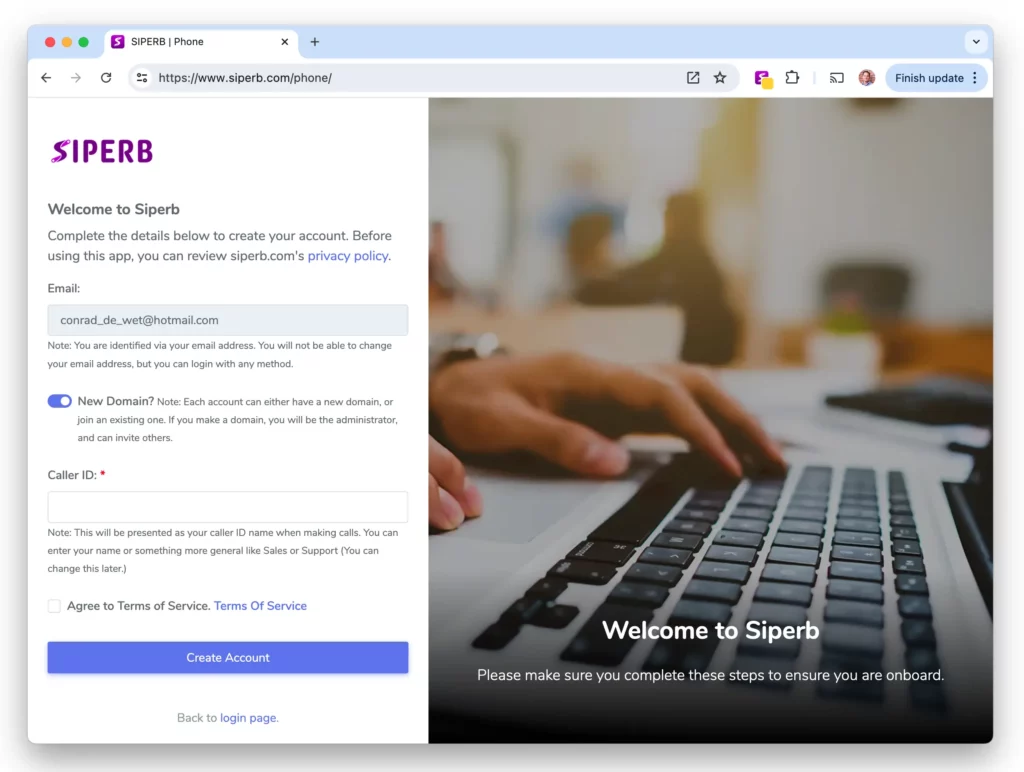
At the next screen you will be asked to provide a Caller ID name and to agree to the terms of service.

Once you have completed the login, you will be presented with the welcome screen if you have not signed up before. The above screen will appear each time you login, but if there is no account associated with your email, this page will display. Even though you may have used the Sign up link from above, only when you complete this page, is your account created.
New or Existing Domain
The domain system is like creating a closed network for yourself and your co-workers. Someone must be the domain Administrator though, so if you have New Domain enabled, you will be making a new domain and essentially making yourself the administrator. This will be fine for a lot of situations, and fine if you simply want to connect your work extension to your phone.
Some of the more advanced features come out when you create a domain. Simply put, all the users within the domain can chat and share information between each other. In addition to this a Domain Administrators can set settings for the Domain Users and may even have access to data like call history and call recordings. So please make sure you are aware of these options.
Existing Domain: Typically, the Domain Administrator would provide you with the domain to enter into this field. This would also be validated against the Domain Administrator account, when you click “Create Account”.
Caller ID
The Caller ID field is for a display name that is displayed to other callers of the same domain (when calling internally). You can also set this to something like “Sales” or “Support” if you are in a call centre. This field can take any characters with a max length of 128 characters.
At this point you would need to tick the checkbox next to the Terms of Service acknowledgment that you have read and understood this.
Create Account
After you click the Create Account button, the account will be created, and a welcome email will be sent to you. There is some valuable information on this email – so it’s useful to keep it.
Provision Device
Siperb makes use of the concept of Devices. You can think of these as instances. A device is typically something like “Work Laptop”, or “Home Laptop” or if you are using the Mobile App, say “My iPhone”, or “Work Phone”. A device allows you to differentiate between places where calls may ring. By default, the system will send a call to all of your Registered devices. This becomes very useful when you have the Mobile App installed and the Web App installed as two different devices. If you receive a call, both devices ring, and you can answer the call on either device. A useful feature of this is that all Call Records are uploaded to the server (if you select this option), and combined so you don’t have to remember on what device you answered the call.
