This article explains how to configure Siperb as a softphone for an existing Asterisk extension or endpoint. You’ll find step-by-step instructions for account setup and advanced options—with particular emphasis on the Transcoding feature, its impact on call media, and the necessary endpoint configuration changes. This guidance is especially important when connecting legacy PBX systems that do not natively support WebRTC’s modern codecs and protocols.
Overview
Siperb is a modern SIP/WebRTC softphone designed to integrate seamlessly with Asterisk and other SIP/VOIP PBX systems. One key feature is Transcoding—the real-time conversion of media from one format to another. When endpoints use different codecs (for example, a WebRTC browser client using the encrypted Opus codec versus a legacy Asterisk endpoint that expects unencrypted G.711), transcoding bridges that gap. However, transcoding comes with trade-offs in terms of processing cost and call latency.
Prerequisites
Before proceeding with the configuration, ensure you have the following:
- Existing Asterisk Extension/Endpoint: Confirm that your extension is active and properly set up on your Asterisk server.
- A modern Web Browser: Chrome, Edge, Safari, or Firefox will be fine.
- Audio Devices: Make sure your microphone and speakers (or headset) are operational.
- User Credentials: Gather your SIP server address, extension number, and authentication details.
- Network Requirements: Verify that your network permits SIP traffic (UDP) and that the necessary ports are open.
- Domain Administrator: Ensure that you are either the only user of the account or that you are the domain administrator.
Configuration Steps
1. Launch Siperb
- Launch your Web Browser:
Navigate to https://www.siperb.com/phone/. - Login via you Google or Apple account, or make use of the Custom oAuth login.
2. Create a Connection to your Asterisk Extension
- Admin Control Panel:
In the main phone user interface, click the Settings Menu icon then Settings
  and then Admin Control Panel
  to access the Admin Control Panel. (This section is only available to Domain Administrators.)
 - Connections:
In the Admin Control Panel click the Connections navigation item on the left to open the Connections page, and click Add Connection.- Connection Name: Provide a simple name to that you can refer to this later.
- Type: Select Outbound Registration. More information on connections can be found here
- Click Add Connection.
- Configure Connection:
Once the connection is added you can access it again, so that you can configure the necessary settings.- Ensure that you set a Dial Pattern to catch all.
3. Configure the Transcoding Option
Find the section Called Transcoding. There is more information on call media transcoding here.
Transcoding Settings
- Transcoding Enabled (On):
- Purpose:
When enabled, Siperb will automatically convert (transcode) media streams from DTLS-SRTP (encrypted, as used by WebRTC) to RTP (unencrypted, as expected by many legacy PBXs). - What Happens:
- The SIP
INVITEis modified by removing ICE candidates. - The media stream is set to use RTP rather than DTLS-SRTP.
- The browser’s Opus codec is converted to G.711.
- A dedicated media transcoding server (RTPEngine) handles the conversion.
- The SIP
- Implications:
This increases interoperability between endpoints with differing codec requirements but also introduces additional CPU load and extra network latency due to the extra hop. - Note: With transcoding enabled your Asterisk server (or any SIP-based PBX) can have WebRTC disabled, and endpoint can be configured as regular UDP/RTP enabled endpoints.
- Purpose:
- Transcoding Disabled (Off):
- Purpose:
With transcoding off, both the Siperb softphone and the Asterisk endpoint must use the same native codec and media configuration. - Endpoint Configuration Requirement:
Your Asterisk endpoint must be configured for WebRTC. For example, its configuration might include:
- Purpose:
[webrtc_client]
type=endpoint
aors=webrtc_client
auth=webrtc_client
dtls_auto_generate_cert=yes
webrtc=yes
; Setting webrtc=yes is a shortcut for:
; use_avpf=yes
; media_encryption=dtls
; dtls_verify=fingerprint
; dtls_setup=actpass
; ice_support=yes
; media_use_received_transport=yes
; rtcp_mux=yes
context=default
disallow=all
allow=opus4. Save and Test Your Configuration
- Save Your Settings:
After completing the configuration, save your changes. - Registration:
Siperb will attempt to register the softphone with your Asterisk server via UDP. (Check the registration status.)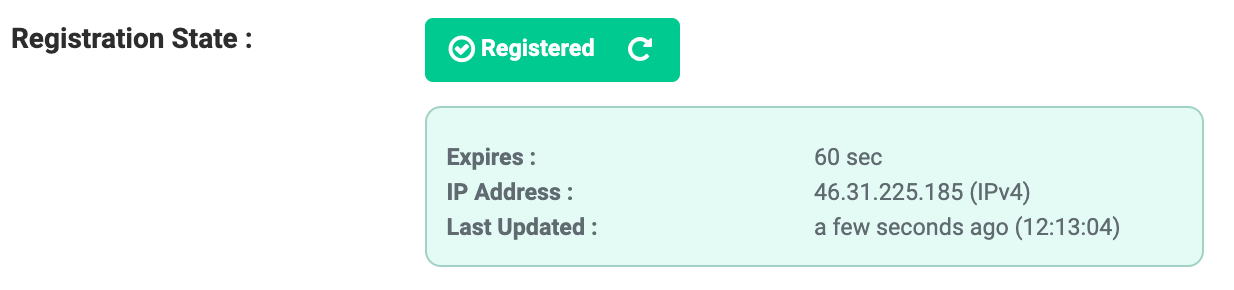
- Make a Test Call:
Place a test call to verify both outgoing and incoming call functionality. If you receive a “Not Acceptable” response from your server, review your endpoint configuration (ensuringwebrtc=yesis set) or consider enabling transcoding in the Siperb connection settings.
Transcoding: Detailed Comparison
The following table summarizes the differences between having Transcoding enabled and disabled:
| Feature | Transcoding On | Transcoding Off |
|---|---|---|
| Codec Flexibility | Supports multiple codecs; bridges between DTLS-SRTP (Opus) and RTP (G.711) for legacy systems. | Uses only the native codecs configured on the endpoint; both sides must match. |
| CPU Usage | Higher CPU load due to the real-time audio conversion process on the transcoding server. | Lower CPU usage as no additional processing is required. |
| Audio Quality | May exhibit slight degradation due to codec conversion overhead. | Maintains direct, unaltered audio quality from source to destination. |
| Latency | Introduces additional latency because media is routed through an external transcoding server. | Minimal additional latency as media flows directly between endpoints. |
| Configuration Complexity | Requires the Siperb proxy to modify SIP INVITE messages (removing ICE candidates, changing media formats). | Simpler configuration, but requires endpoints to be fully WebRTC-compliant. |
| Interoperability | Enhances compatibility when endpoints do not natively share common codec or encryption settings. | Best when all endpoints are uniformly configured for WebRTC operation. |
Conclusion
By following these instructions, you can successfully configure Siperb as a softphone for your Asterisk extension while balancing the need for codec flexibility and system performance. The Transcoding option provides a robust solution for integrating legacy PBX systems with modern WebRTC clients, albeit at the cost of increased processing and potential latency.
For environments where your Asterisk endpoint can be configured for WebRTC (using settings like webrtc=yes as shown above), disabling transcoding offers a direct, efficient connection. In scenarios where endpoint modifications are not possible, enabling transcoding ensures seamless communication by letting Siperb handle the necessary media conversion.
For further details, troubleshooting tips, or custom configuration options, please refer to our related articles or contact Siperb support.